Showing posts with label DIY. Show all posts

5/14/10

Laundry Room Reveal

I’ve been talking about and stressing over it for weeks now but my laundry room is finally done and I love it.  We have been looking at our sad excuse for a laundry room for 3 years now and it has been a thorn in my side.  I hated this room.  It was ugly, dirty, disgusting and embarrassing.  I felt like it reflected poorly on us as home makers.  We walked through this tiny room several times a day over the past 3 yrs and tried to ignore it because there were bigger fish to fry.  But it is complete and I am no longer embarrassed.  I want to show it off!

First let me give you the basics.  Our laundry room is tiny.  When the door to the kitchen and to the garage are open at the same time, you can barely stand in it.  It is simply a passageway from the garage to the kitchen.  But it gets a lot of foot traffic since it’s how we enter and leave our home.  It had half removed floors, no cabinet doors, disgusting wall paint, moldy trim, missing light switches and dingy cream colored doors.  I can’t believe we put off this remodel for 3 yrs!

I want to apologize for the poor quality of the pictures.  It’s hard to get the right angle in a room so doggone small!

Check out the before…

P1020801 This floor is a sight for sore eyes.  This was our attempt (3 yrs ago) to remove the disgusting vinyl flooring.  We thought it would be easy….not so much! Notice how small our walk way is with both doors open.

P1020802 No doors on cabinets.  Cabinets are stuffed full with misc items and tools that are supposed to be in the garage
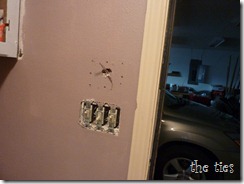
P1020804 I’m sure this is a safety hazard…that’s all I have to say!

P1020805 Look at our ceiling which was patched up when we moved in (3 yrs ago) because it was sagging for some unknown reason.  Terrance patched up the sagging but didn’t follow through so it has looked like this for….say it with me… 3yrs! The puke pink color was my attempt to make the room look feminine a year or so ago.  It didn’t work. It was the ugliest pink known to man.  Look at the color of that door.  Um…. Gross!

So Terrance got busy!

P1020845 Making progress.  A friend of ours blessed us with a paint sprayer and Terrance put it to good use.  The thing is amazing.  Here are our doors drying in the garage on a makeshift clothesline (the tracks of our garage door)
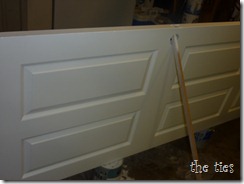
P1020846 pic of door after painting, no more dingy door

And look at us now! Drumroll please…..

P1020905 I finally have my key rack!  I have been late to a many places because I’ve misplaced my keys.  Not a problem anymore.  I even like the picture of the puppy that says ‘Laundry Services, Help Wanted’  I now have bright white trim and new light switch covers.  Loovvvee it!

P1020915 This trash can is so perfect.  It is a cutesy yellow color and just the right size.  No more collecting lint and dryer sheets on top of the dryer.  Just step and drop!  Also check out my new tile floors.  This is the best tile job that Terrance has ever done (and he’s done a lot).  It is almost perfect.  So much nicer than the tacky vinyl!

P1020912Isn’t this gorgeous?! My cabinets have doors with shiny new pulls and the ‘Laundry’ sign is perfect.  I even added some pictures for that personal touch ( I just noticed that the pics are crooked…my bad).  My powdered detergent (yes, I have both powdered and liquid…a girls gotta have options) got a new home in this cute glass jar.  It sits on top of the washer for easy access. 

P1020910 Awwww, me and the boys.  My inspiration to do laundry!!! I wish I had a picture that really captured the yellow we used on the walls and ceiling.  The paint color is called Vintage Yellow by Glidden. It is the perfect yellow. The pictures don’t do it justice.  It really opens up the tiny dark laundry room.  I even keep the door open to the room now whereas before, I hated to even walk through it to get to and fro.

P1020917 Just another view of my new favorite room!  I’m so happy.  You can see also that the ceiling is yellow and we got us a new light fixture because the old one was t.a.c.k.y.

Once again, my hubby came through on this remodel.  He wouldn’t let me help at all.  I didn’t even get to paint.  I just came in at the end to clean up and add a few accessories. Now we’re DONE! Overall, it took a week from start to finish with Terrance just working on it a couple hours in the evening after work. 

Here are the nuts and bolts:

Tile: $46

Paint: $32.00

Accents: $18.00

Light switches & Covers $19.00

Ceiling Light: $15

Misc:$39.00 (tools and equipment)

Total: approx. $170.00

5/12/10

DIY Bookshelf

A while ago I wrote about a website called Knock Off Wood that a friend told me about.  Our original  goal was to make a new bed with plans from this site, but we started small and made a new bookcase just to see if this whole DIY thing would work for us. 

P1020280 Here’s Ian enjoying a hodge podge snack in the garage while dad worked on the bookshelf

032 here are all the supplies used (minus tools)

P1020282after assembly… which took less than an hour

P1020901  here’s the finished product after sanding and applying two coats of white paint

P1020903 In use in our master bedroom as a media console

The cute fabric bins are from Tarjay and I added them for a little extra storage.  The lamp (stolen from the office) provides the perfect ambiance at night.  I’m horrible at decorating and even worse at placing trinkets and knick knacks so if anyone has any ideas of ways to spruce up this area feel free to share.  The mini yellow flowers were a Mother’s Day gift from the boys so I threw those on there for kicks and grins.

So all in all…the project was super easy.  I took the directions (printed directly from Knock Off Wood) to Home Depot and they assembled all the supplies together for me. I think the lady felt sorry for me because Ian was super cranky and of course when Ian is unhappy….everyone is unhappy.  They even measured and cut the lumber for free.  I am so in love with them for that because it would have surely taken longer than an hour to assemble if we had to cut and measure everything on our own.

Since I went to Home Depot alone, I kind of went overboard of course. I upgraded the materials used in the plans (because the lady said it would make my bookcases look nicer) and I bought a few extra things that my husband already had like nails, painting supplies, sand paper, wood glue, and wood putty. We kept it all anyway because things like that are good to have around…right?!

The plans on Knock Off Wood were for two bookcases so we have extra materials in the garage waiting to be used. Our plans are to half the recipe and make two night stands.  We’ll let you know how that goes!

I’m super proud of my hubby.  I think the bookcase/console looks really nice in our room and we saved a ton of money doing it ourselves. 

Now on the next project…..

3/4/10

Knock It Off

As you know, the blogosphere is filled with blogs about any and everything.  A friend of mine introduced me to a blog called Knock Off Wood.  I looove it.  This blog has all kind of designs for all kinds of knock off furniture from places like Pottery Barn (who we all know is super expensive) and Land of Nod.  The site owner, Ana, makes instructions that are super easy to follow to make things even better. 

We have been in the market for new bedroom furniture but we are unfortunately on a bit of a budget.  Well Knock Off Wood had plans for this Farmhouse bed from Pottery Barn

pbfarmhouse image from Pottery Barn

YAY!  Since I have a pretty handy husband, we decided to try our hand at building furniture.  Anything to save a buck, right?

I knew it would take some time to build a king sized bed… so we decided to start with something small.  The site also had plans for these bookshelves which I thought would be perfect to use as night stands on either side of the bed (once it’s built).

Pottery_Barn_Cameron_Bookcase_pink-green  image from Pottery Barn

So off we went to Home Depot (me and the boys) to get everything we needed to build our bookshelves.  I took a copy of the plans which had detailed instructions on what to buy and what tools you’ll need to get the project done.  Lisa, at Home Depot took care of the rest.  They were awesome there.  They didn’t seem to be bothered that I was completely clueless with two rowdy boys that were hungry and ready for a nap. Sam over in the lumber cutting area cut all of the boards to the exact measurements listed in the instructions and we were off to make some furniture.

This may take a while considering I work weekends and my hubby works during the week and we seldom have a lot of overlapping time.  We will get it done though.  Keep ya posted.

Related Posts with Thumbnails